Our important tutorial today is about making the World of warcraft server and the Teamspeak server online. You can provide a server online in two ways after installation.
The first thing you do not need to do much is to run your world of warcraft server or Teamspeak server on a virtual server or the same Vps, and after installing your epi, enter the Vps in different places on the server.
But the second case is running the server in the blood system (other than Vps), which we will teach you in this step-by-step tutorial with video today.
For this purpose, watch the video below in this regard.

Ports required for World of warcraft server:
3306-8085-3443-8080-3724-80
Necessary ports for Teamspeak server:
UDP 9987
TCP 30033
TCP 10011
TCP 10022

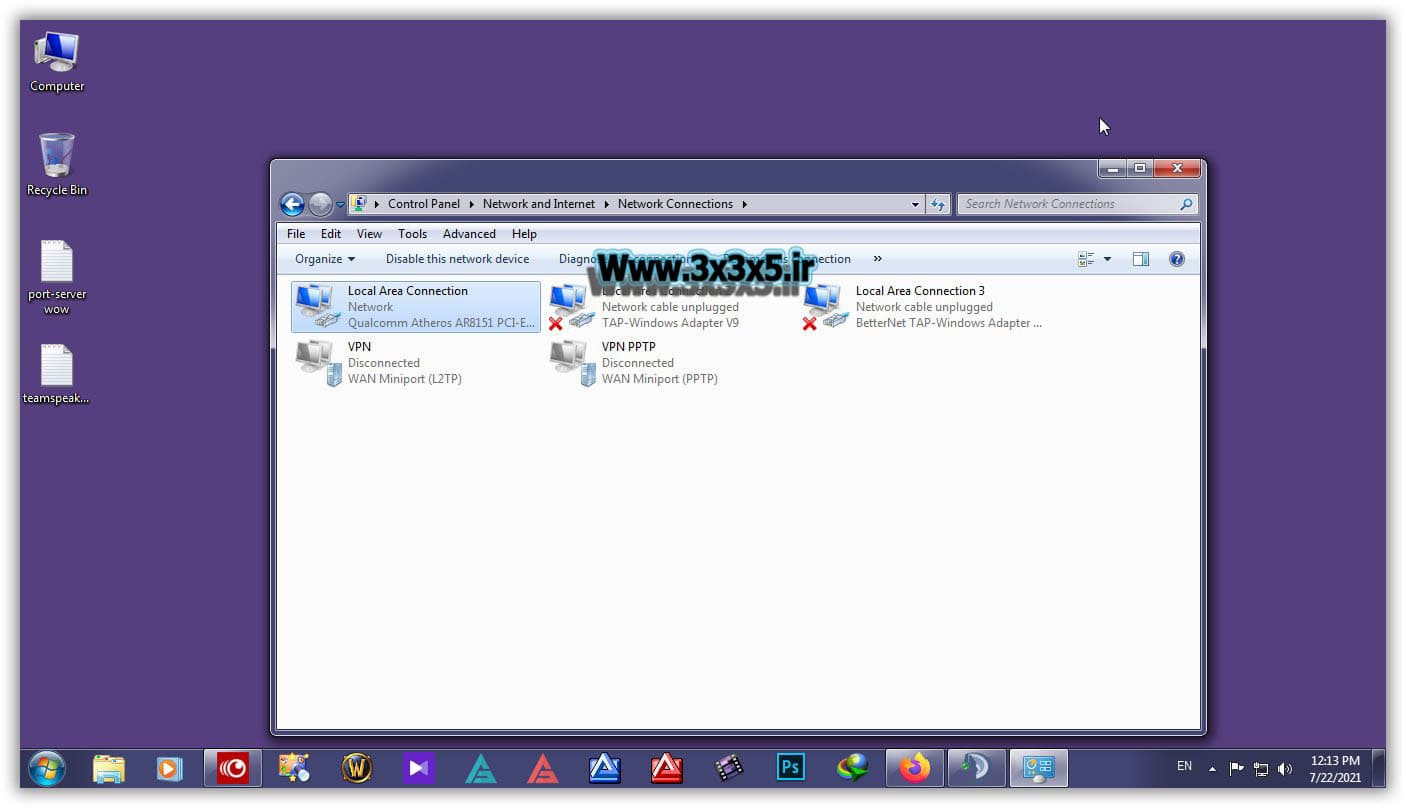
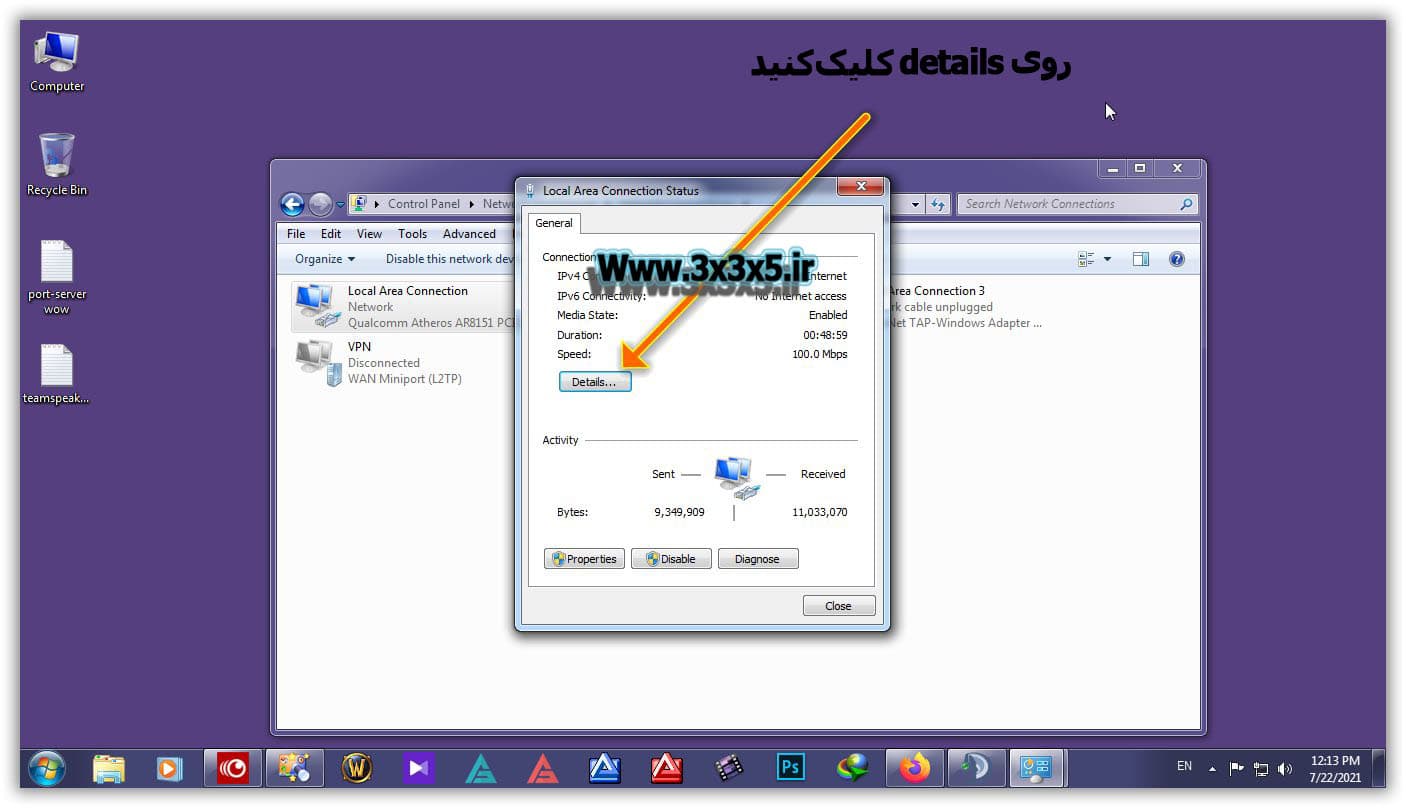
The first thing is to click on your computer’s local area connection and click on details in the window that opens.
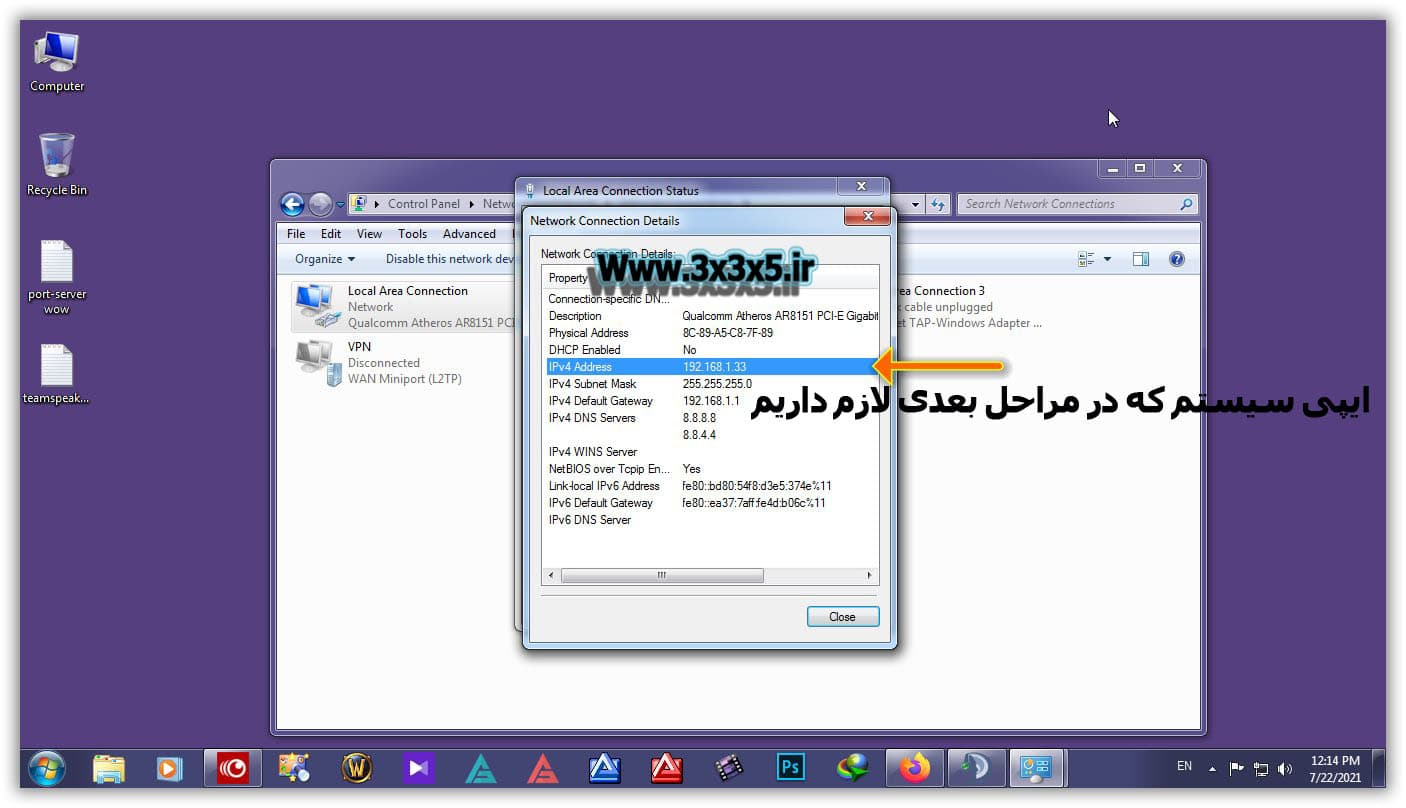
In the next step, like the image below, the ip of your system is shown that we need this ip in the next steps.
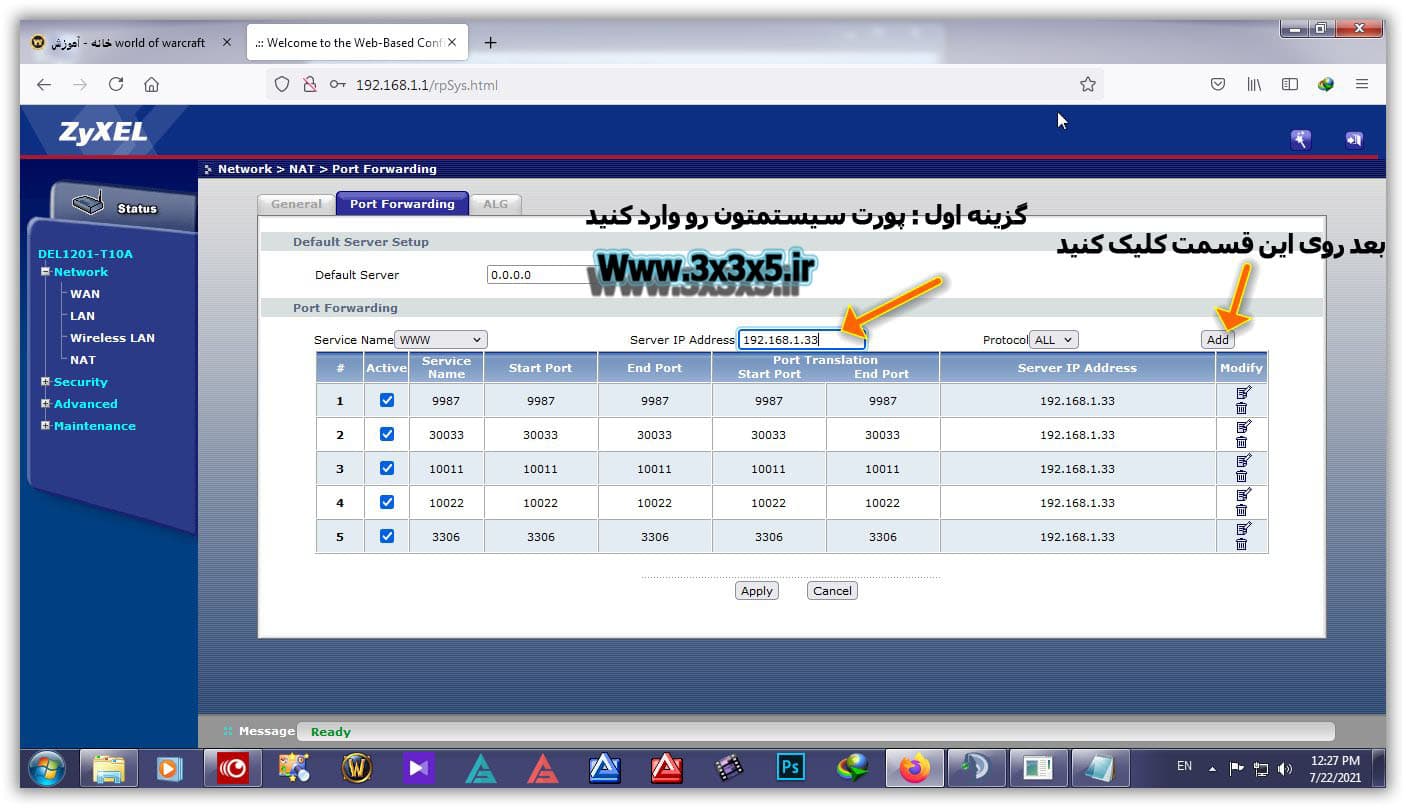
Step 2: The above ports that I wrote, you have to add to the port forwarding of your modem, since my modem is Zyxel and I taught in the video with the same modem, in this section I am adding a text description about adding I am talking about the port to the Zyxel modem.
Port Forwarding steps in Zyxel
First enter the address 192.168.1.1 in the browser and enter the username and password in the similar page that opens below.
In the Network Setting section, select the NAT option.
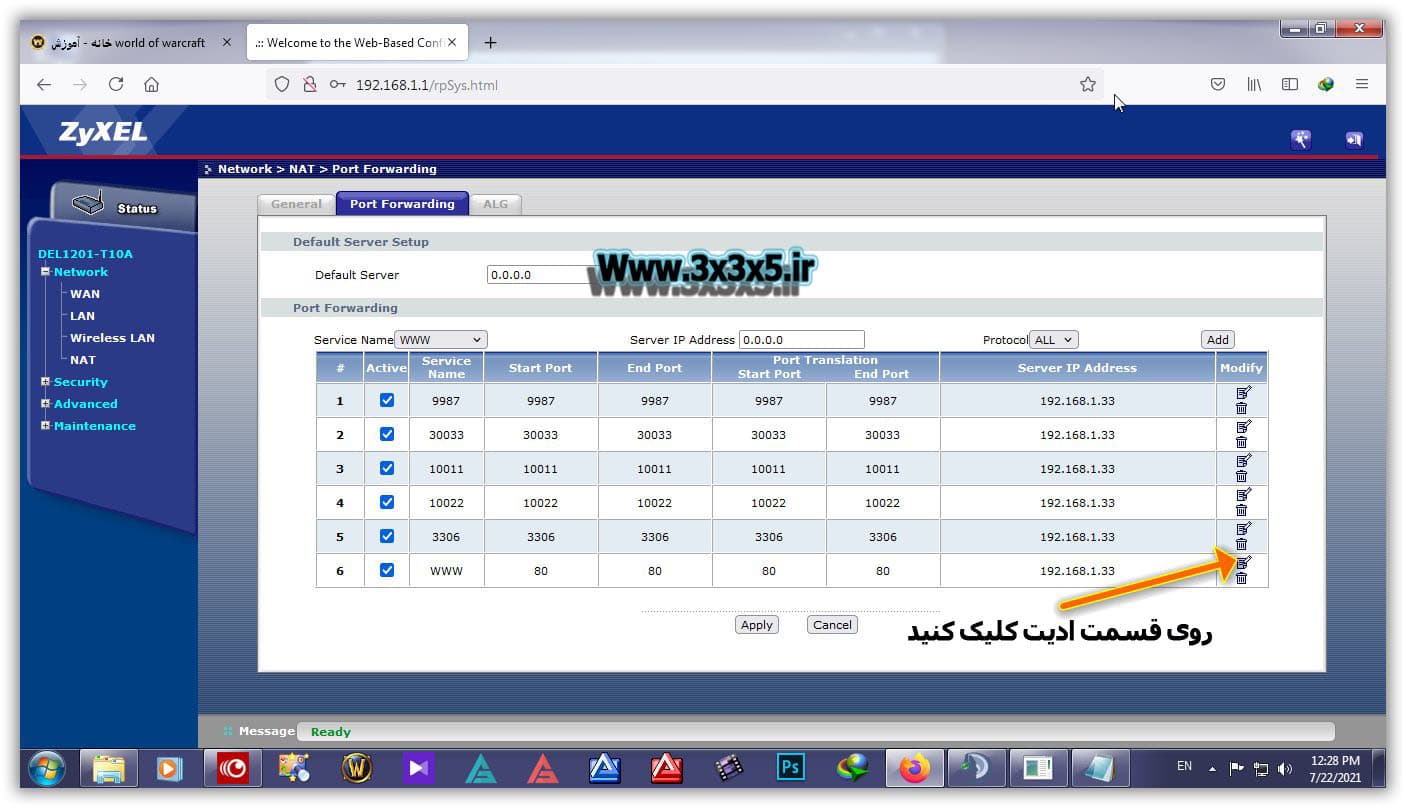
Go to the Port Forwarding tab for the ZYXEL modem forwarding port.
Click Add to define a new rule.
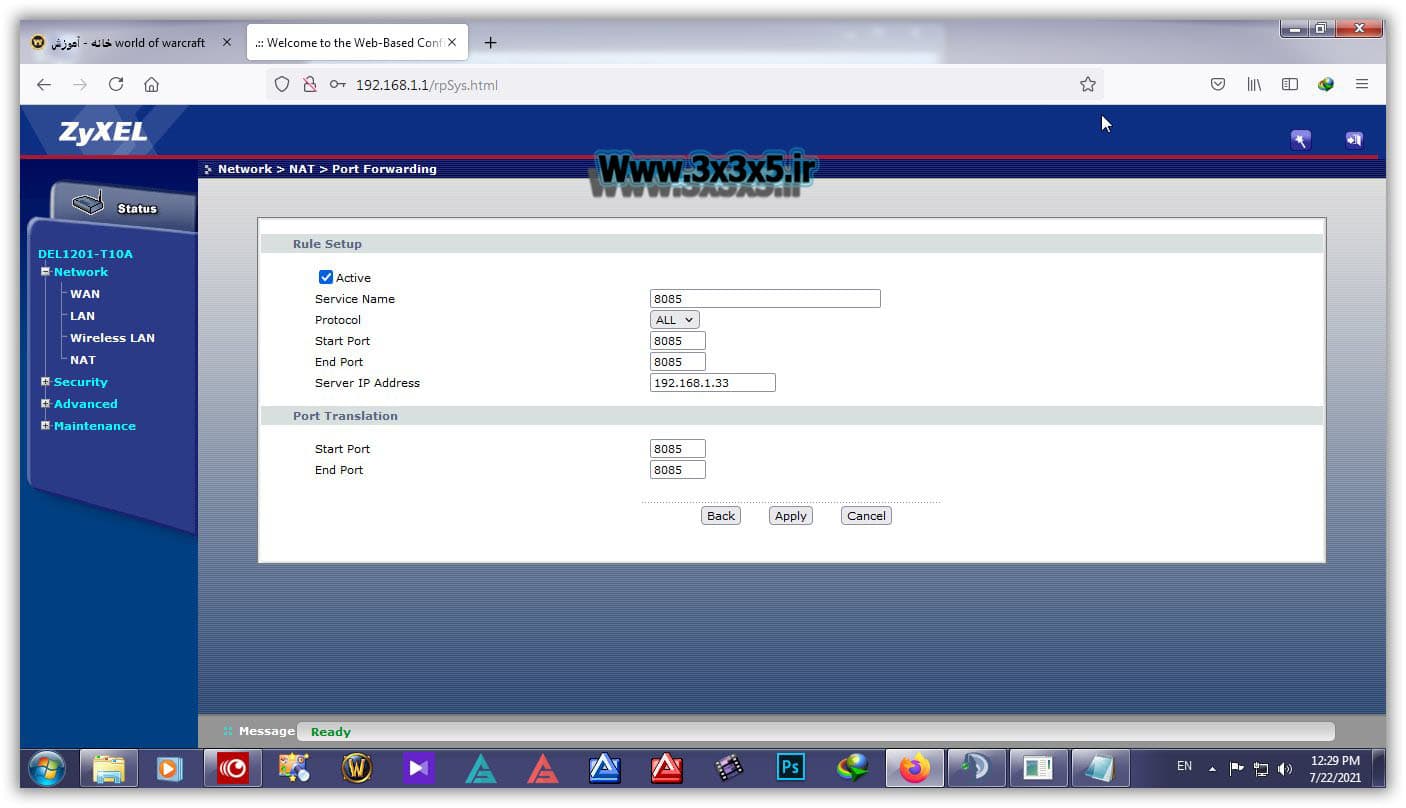
In the next step, click on Edit as shown below:
You can specify information such as port and IP address and protocol and also check Active.
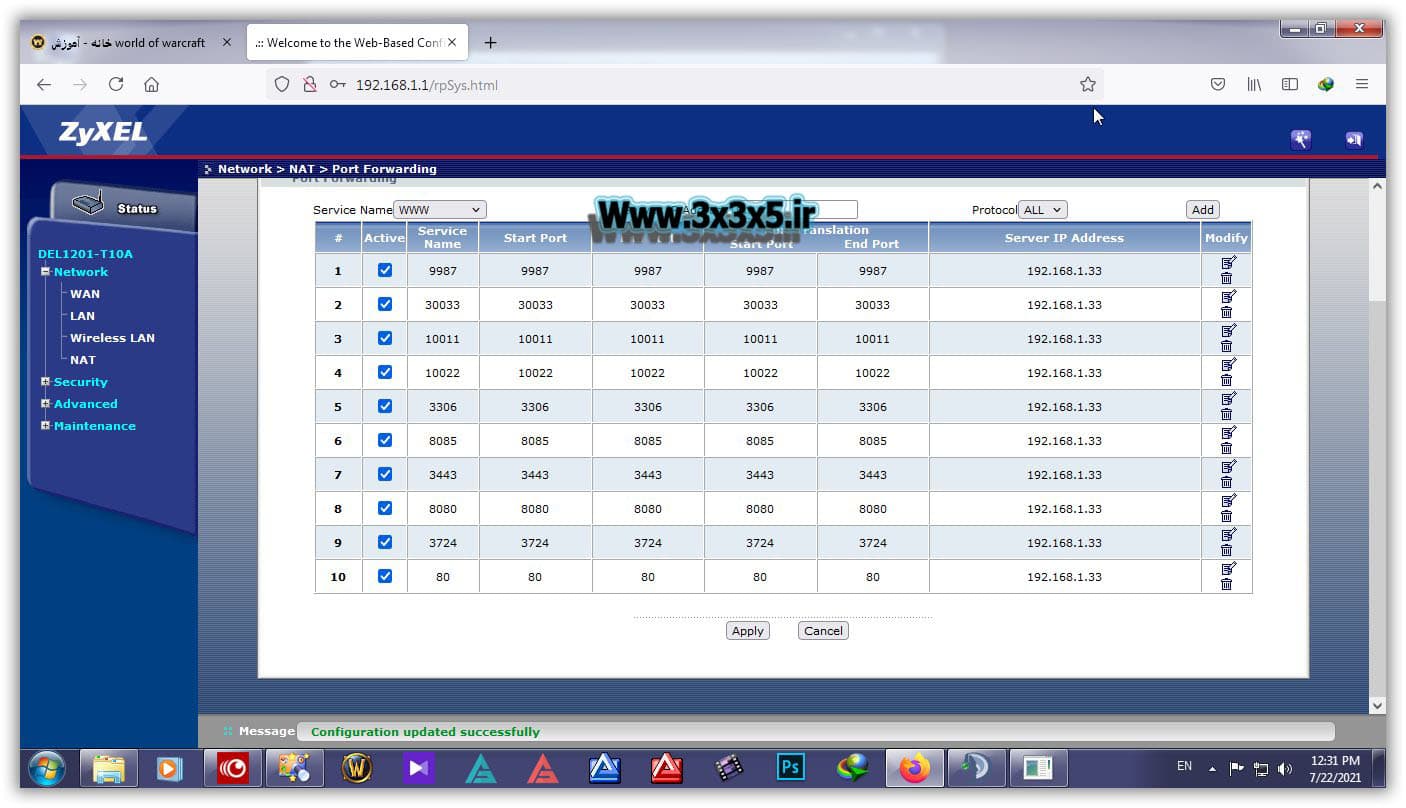
In the image below, you can see an example of the ZYXEL modem forwarding port settings.
We could easily forward the desired port on Zyxel.

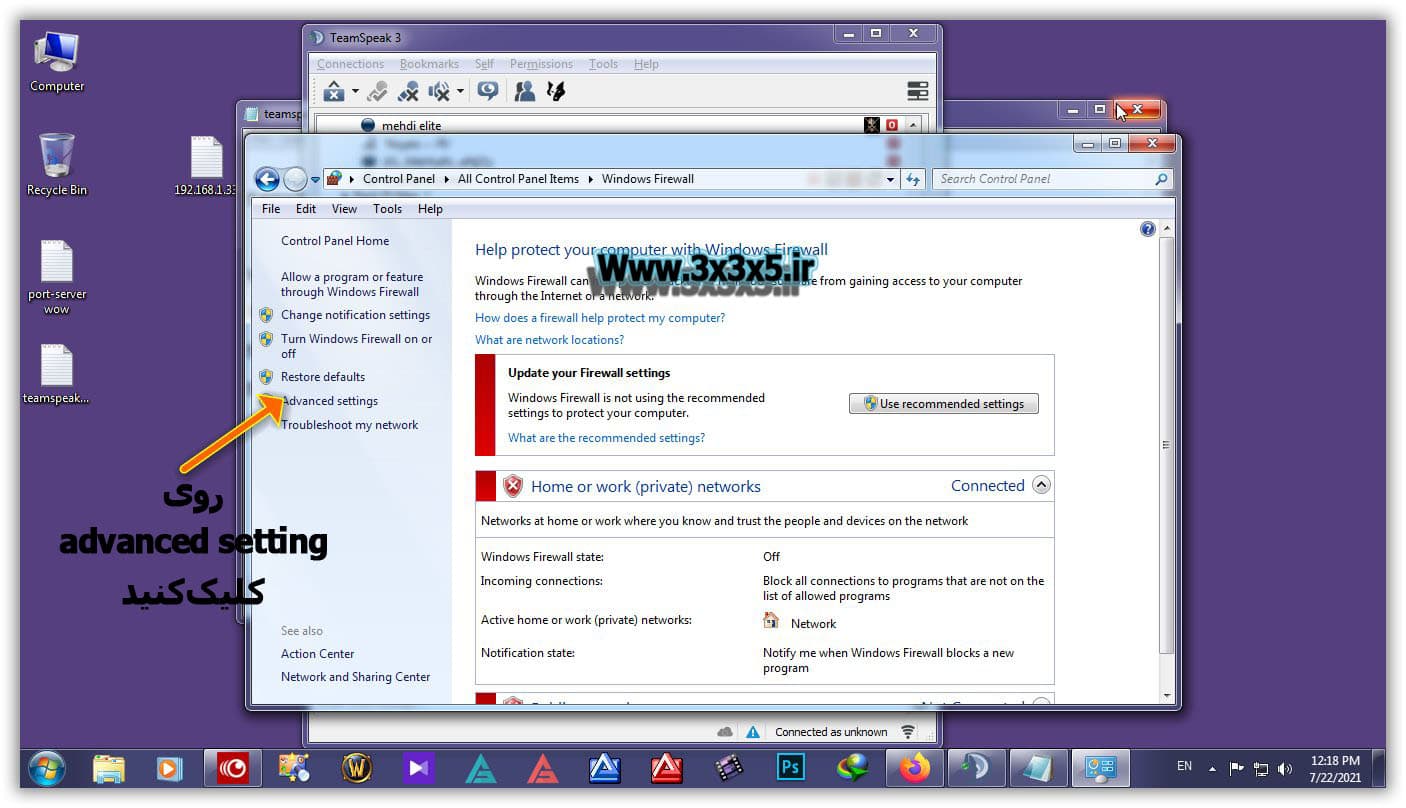
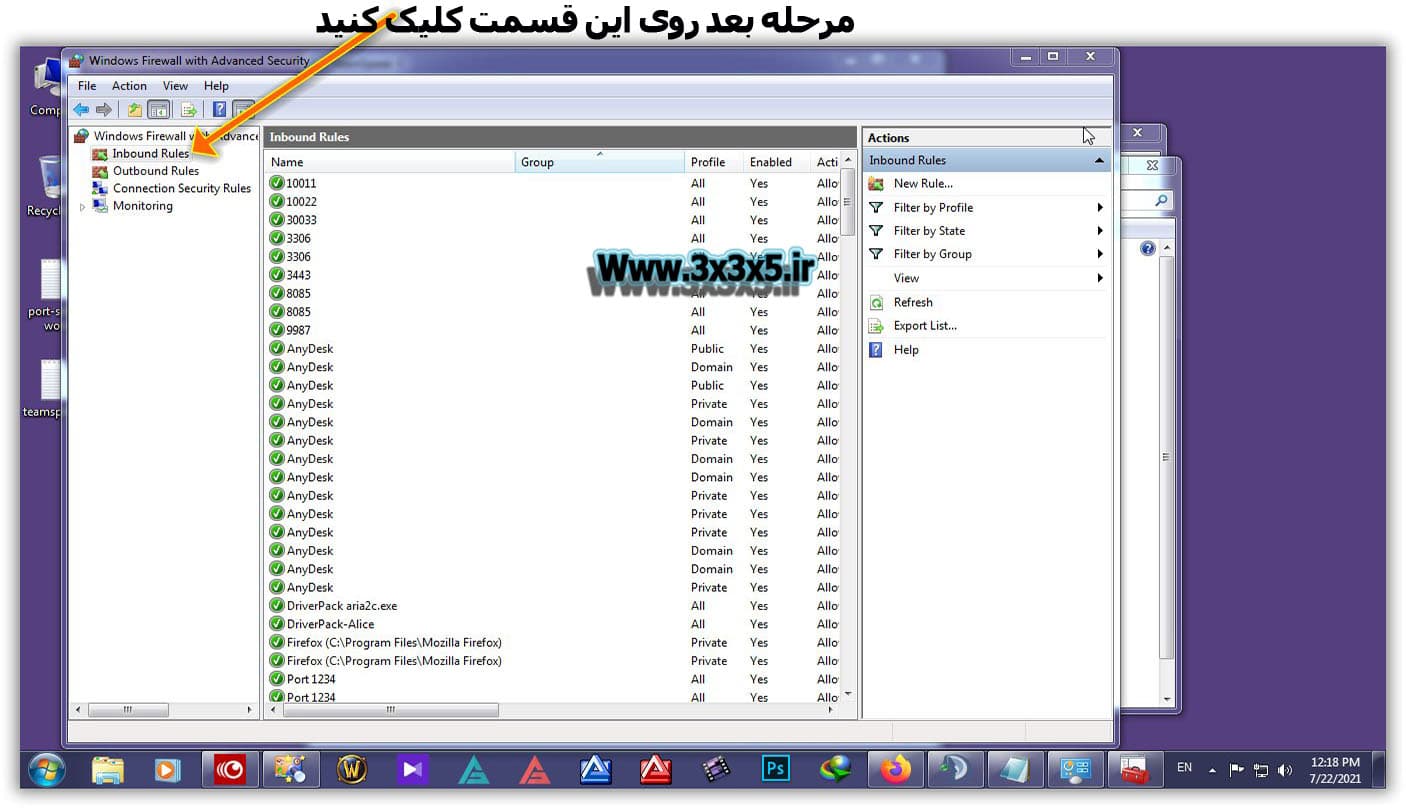
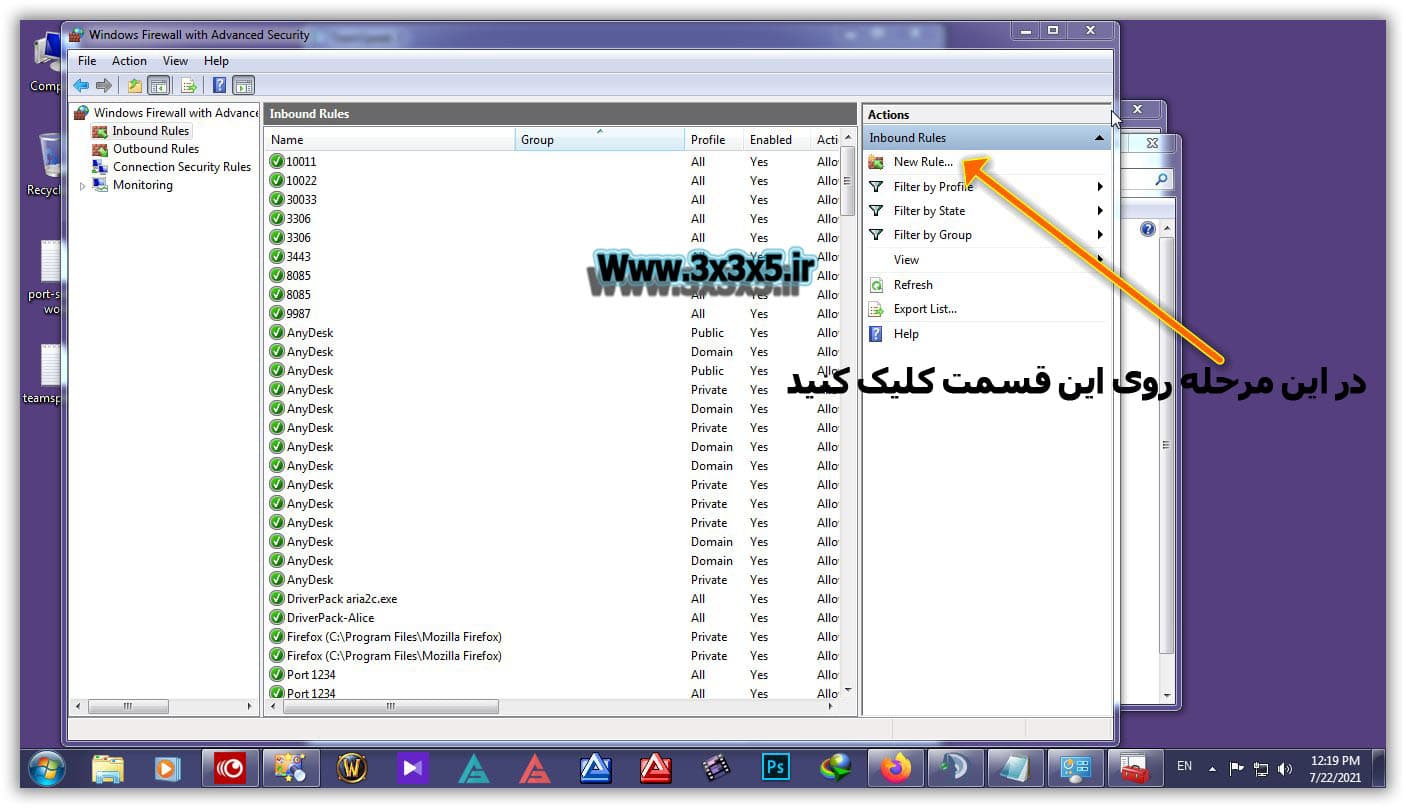
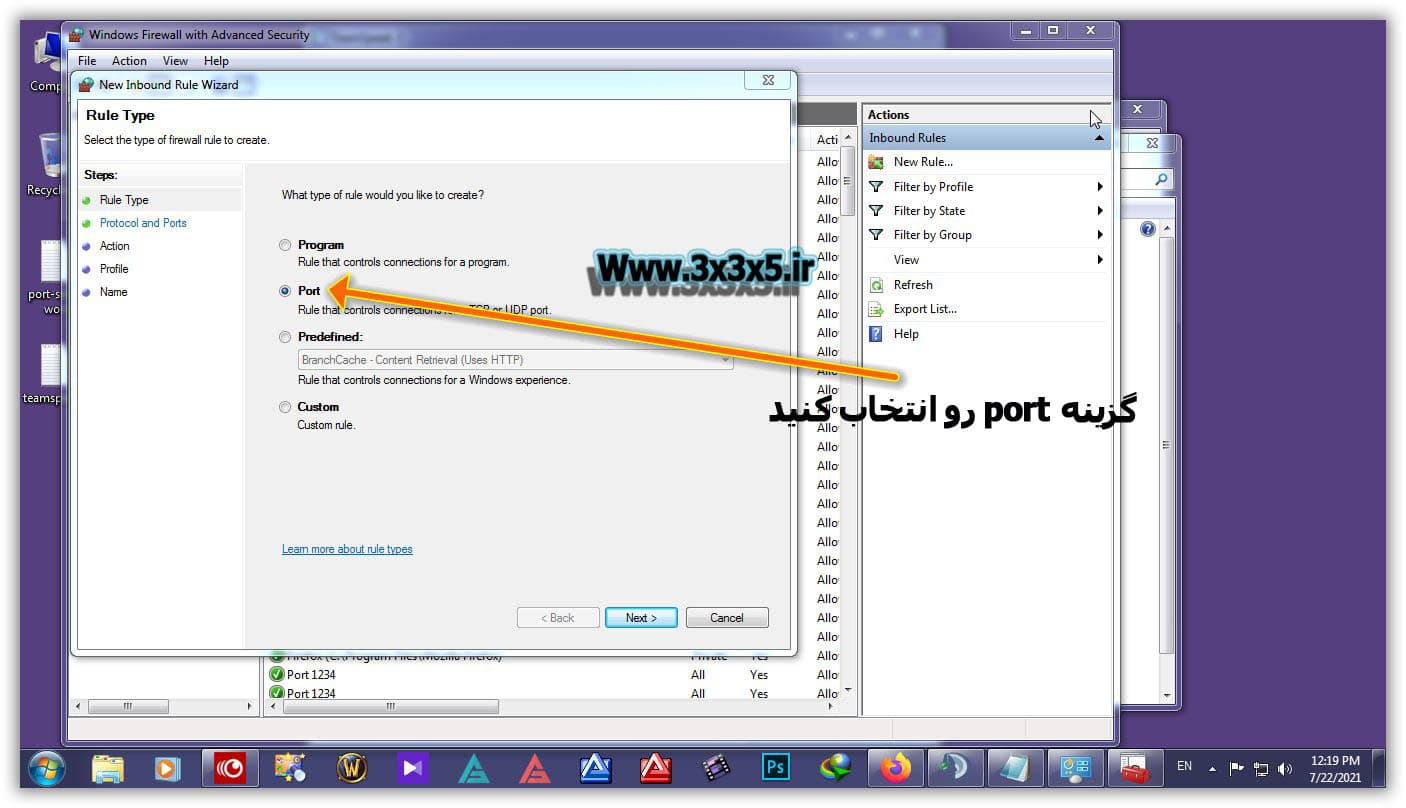
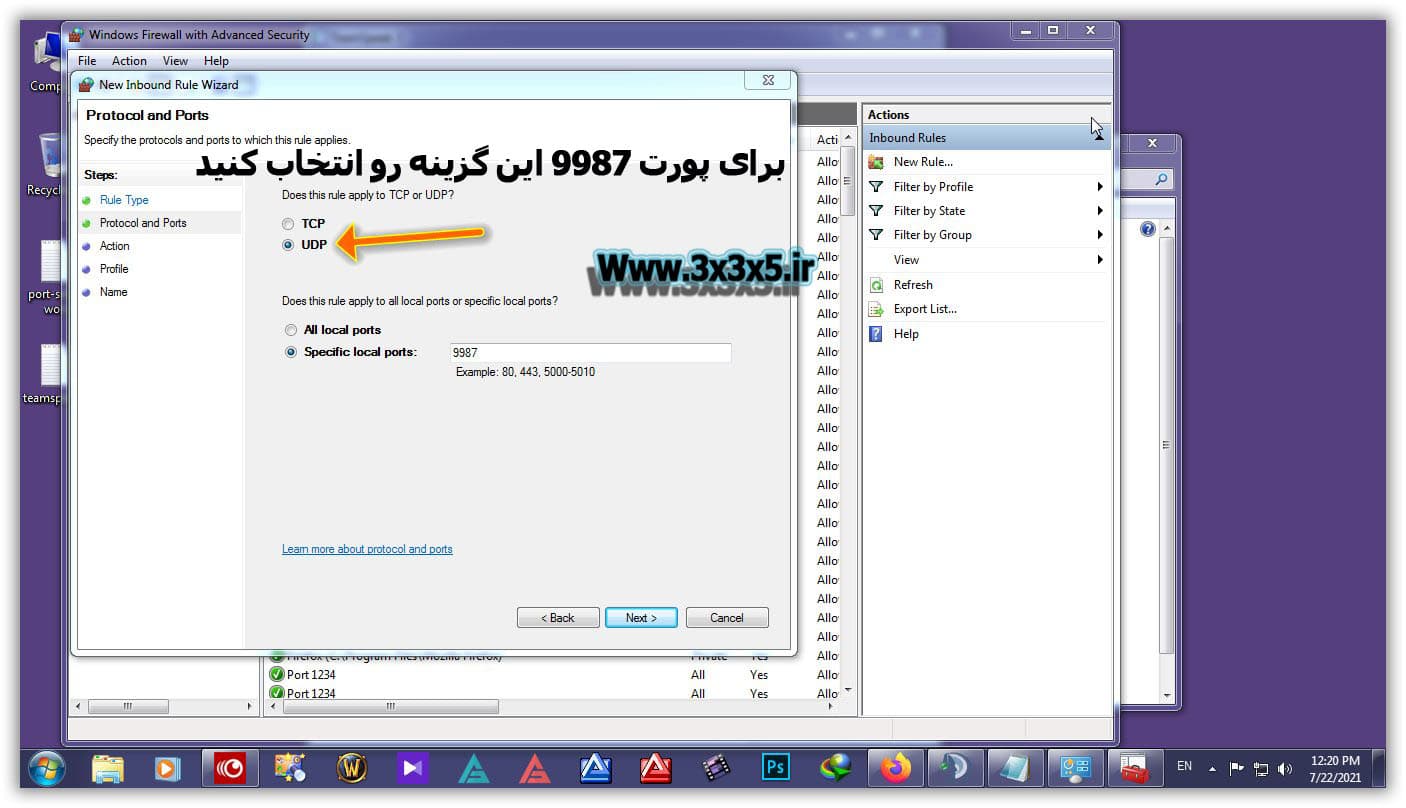
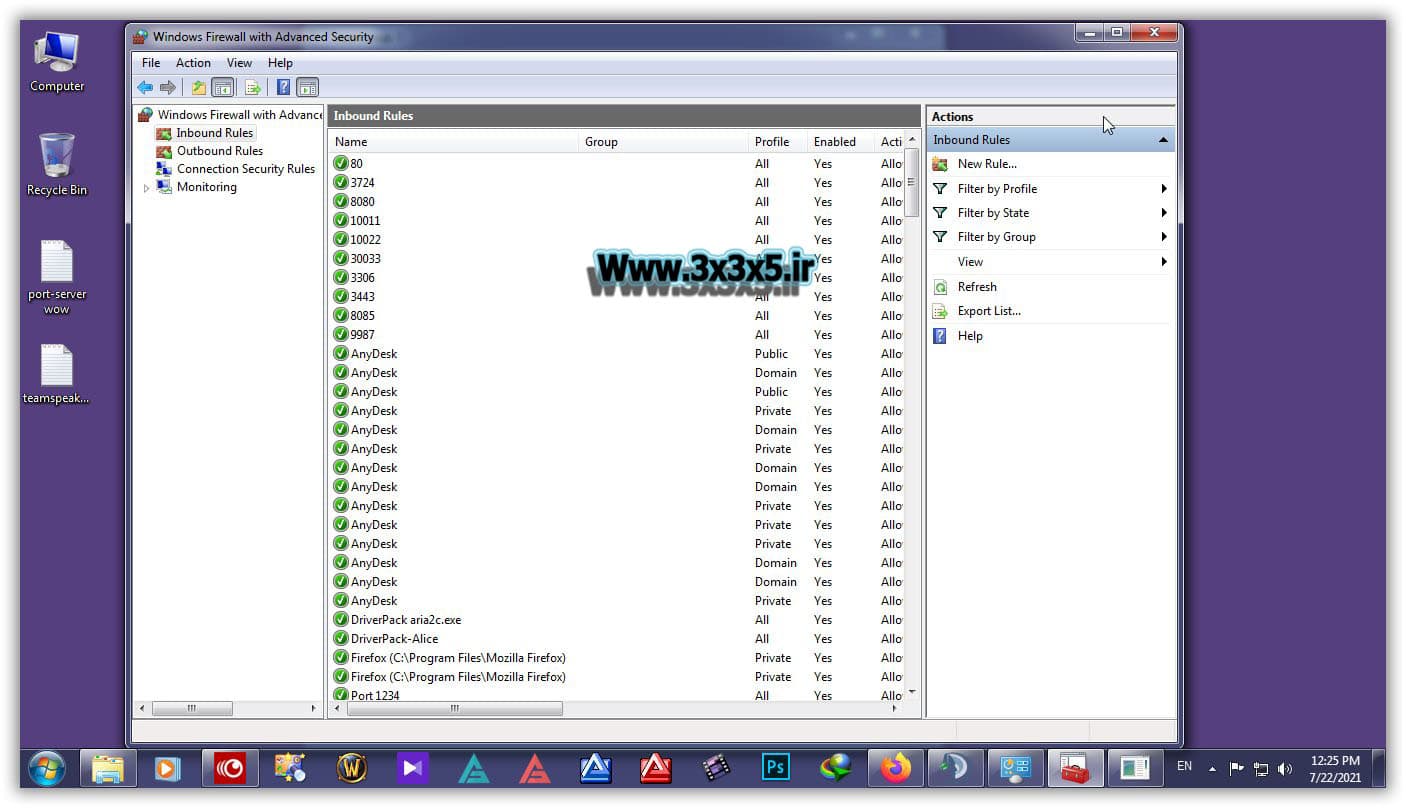
To open the port in the firewall, proceed as shown below.
We only put the UDP part for port 9987, but the following items are TCP:
The image below is after the end of the step of adding ports to the firewall.

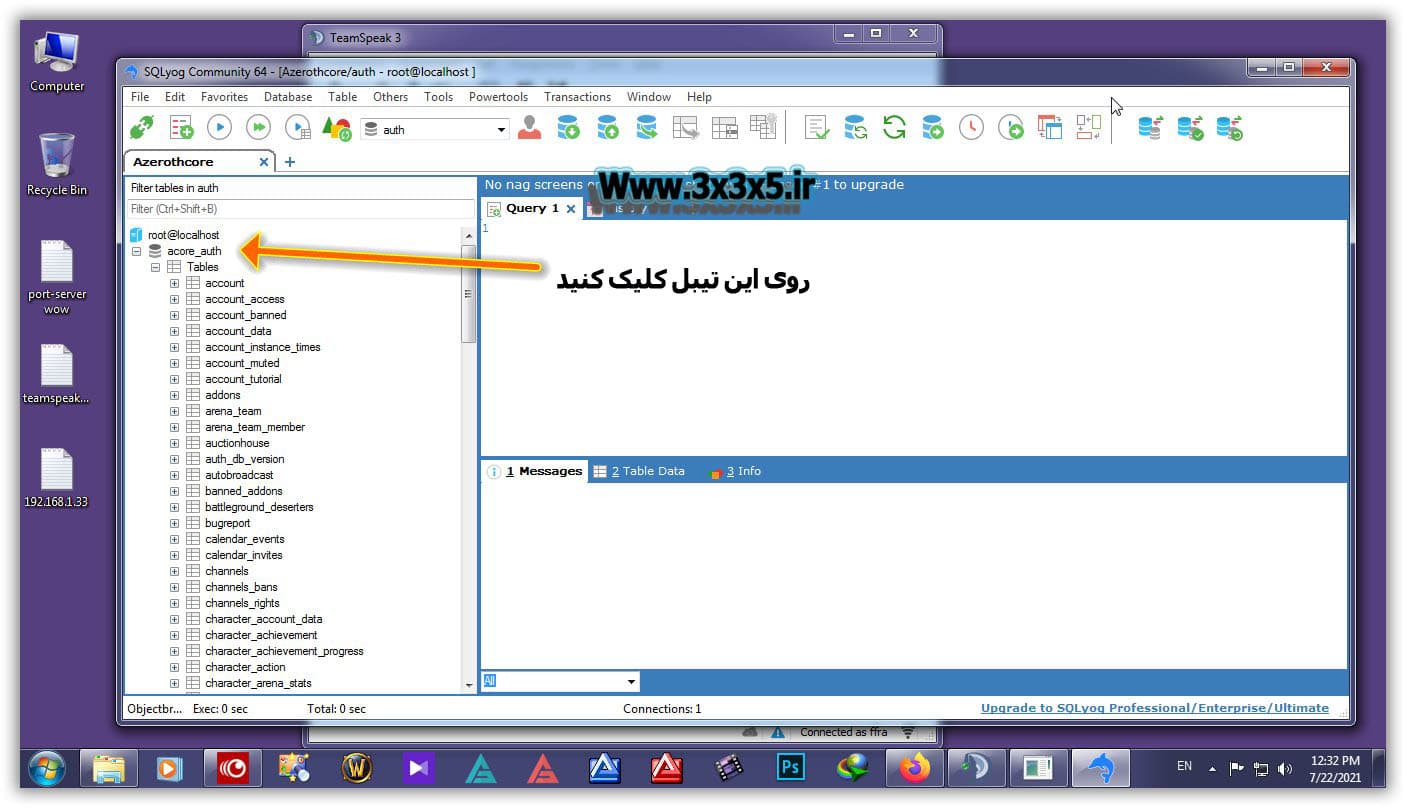
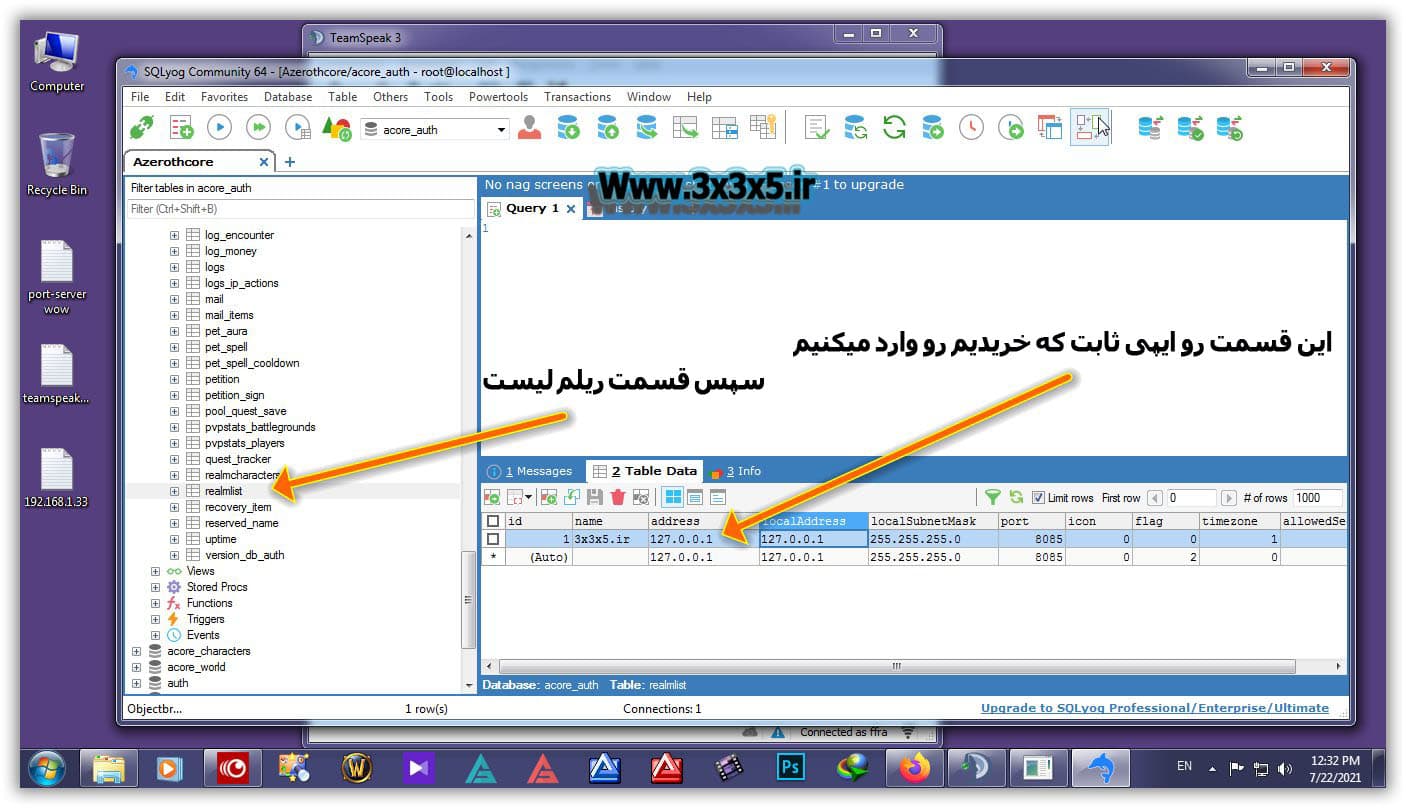
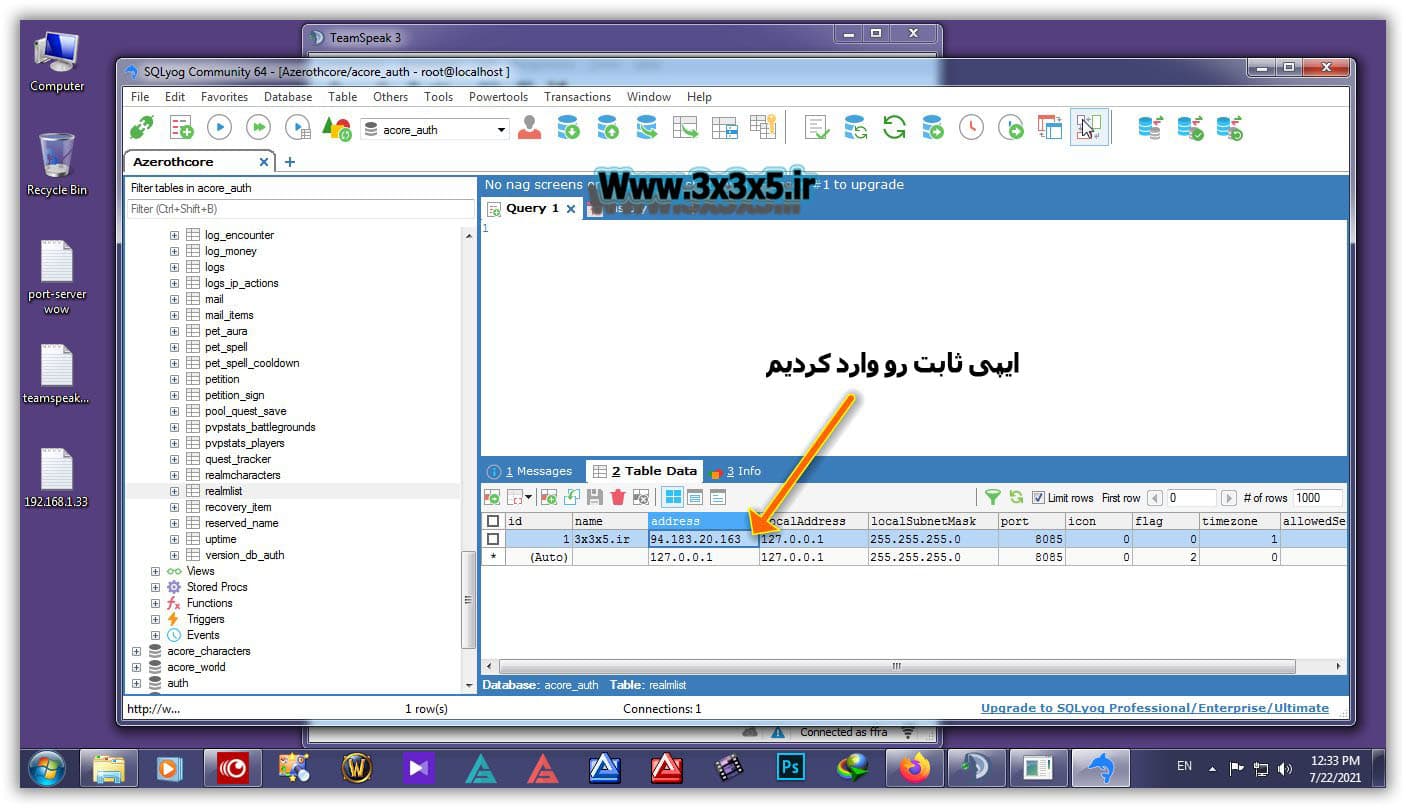
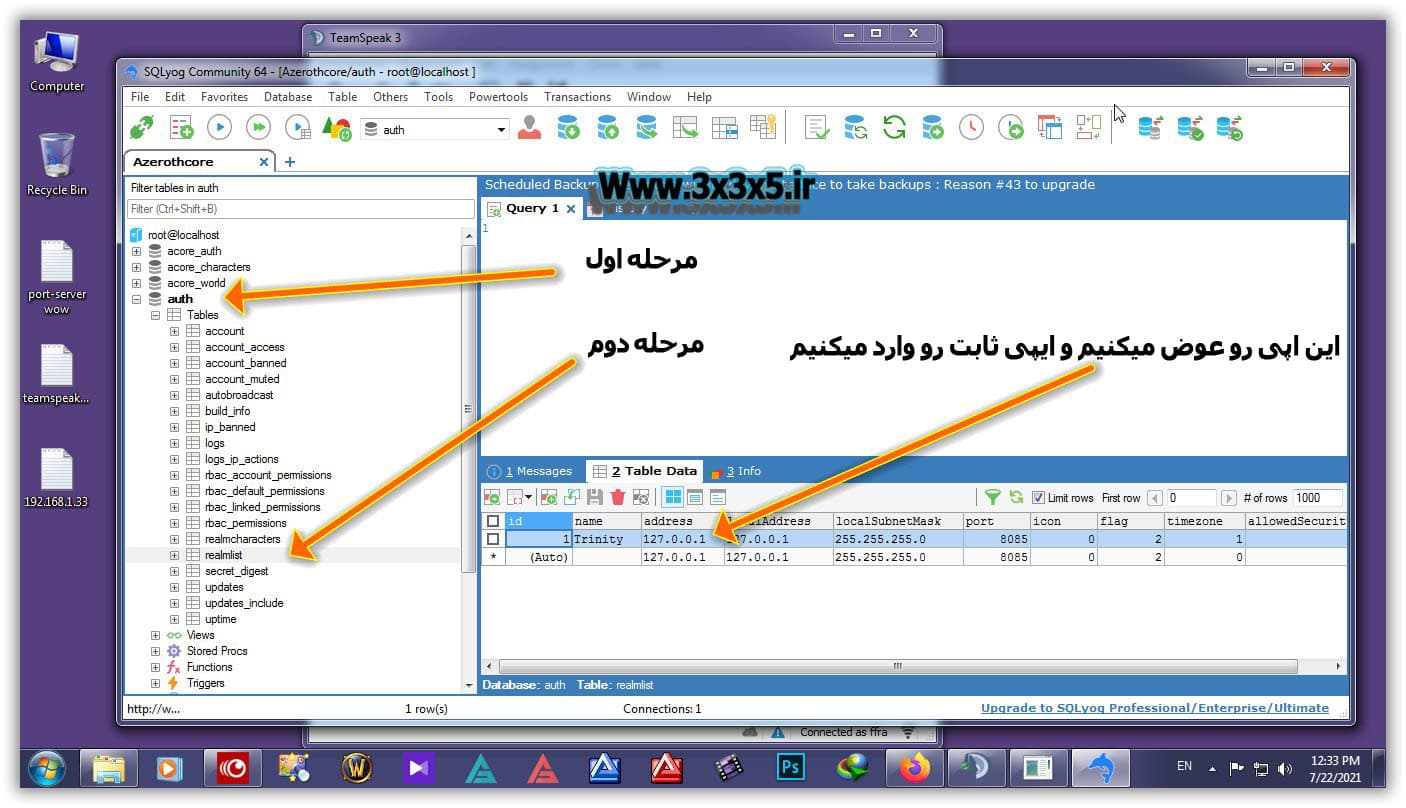
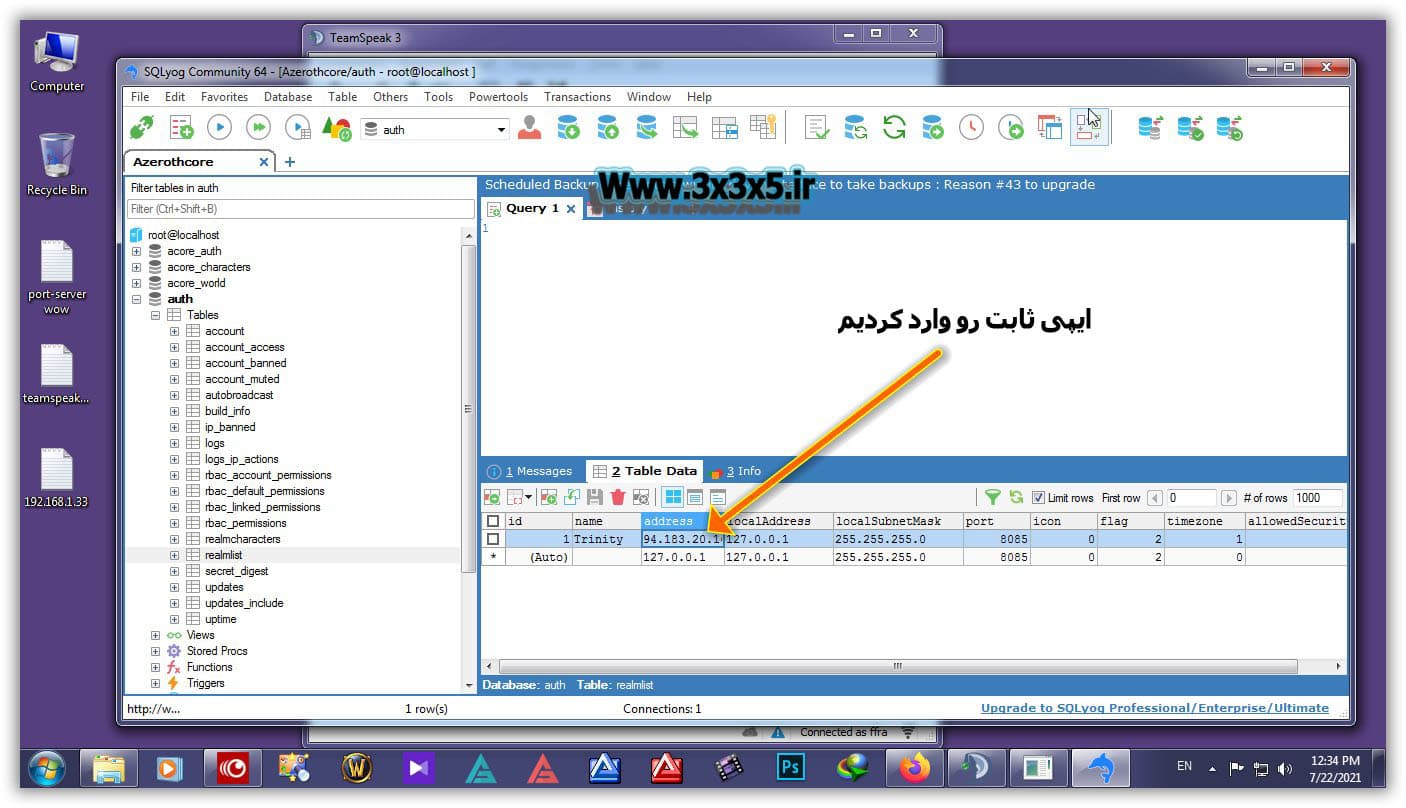
The next thing is to change the list server to the following image for the AzerothCore version:

The following image for the TrinityCore version:


